How to Install a Standalone Certificate License
Automatic Installation
Make sure your USB key is plugged in before running GeoStudio, and GeoStudio
will automatically install any licenses that are tied to
hostids it detects on your computer (such as a USB key).
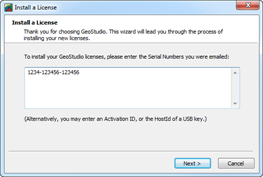
Using the License Installation Wizard
Beginning with the September 2013 Release of GeoStudio 2012, you can install
any license by choosing Help Install a License... from the GeoStudio
menu. Enter the licenses' Serial Numbers and follow the instructions on
your screen.
Manually Installing a Certificate License
If the automatic installation does not work for some reason, you can download
a certificate license, then save it to the Licenses folder.
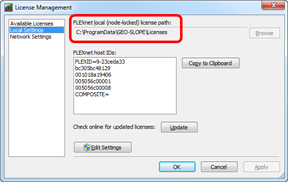
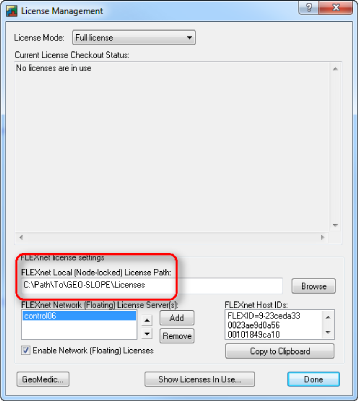
To determine the location of your Licenses folder, run GeoStudio and choose
Tools License Management from the menu. You will see a dialog box
similar to one of these, which displays the path to the Licenses folder:
GeoStudio 2012, look on the "Local Settings" tab:
GeoStudio 2007 and earlier:
When you download a license file, your browser will ask if
you want to Open or Save the file. Choose Save (if you choose Open and it
opens in Notepad, then Notepad will sometimes change the file extension to ".lic.txt",
which makes the file unusable), navigate to the Licenses folder,
and click Save.
GeoStudio 2007 on Windows Vista or Windows 7: If your Licenses folder
is under the "Program Files" or "Program Files (x86)" folder, you may encounter
trouble updating license files. Please read the Knowledge Base article
KB743: License File Problems on Vista and Windows 7
and follow the simple instructions to move your license folder to a different location.
It's a good idea to delete your old license files or move them to a different
folder after downloading a new one. That will speed up the time it takes GeoStudio to start up, and avoid problems
where it uses an expiring license instead of a newer one.